Introduction to Panettone
Exploring the Classic Panettone Recipe
Ah, the panettone recipe! Just the mention of this festive dessert conjures images of joyous holiday gatherings, where laughter dances through the air, as warm and inviting as the scent of this sweet bread. Originating from Milan, panettone has woven its way through the fabric of holiday baking, becoming a beloved symbol of Christmas not just in Italy, but around the globe.
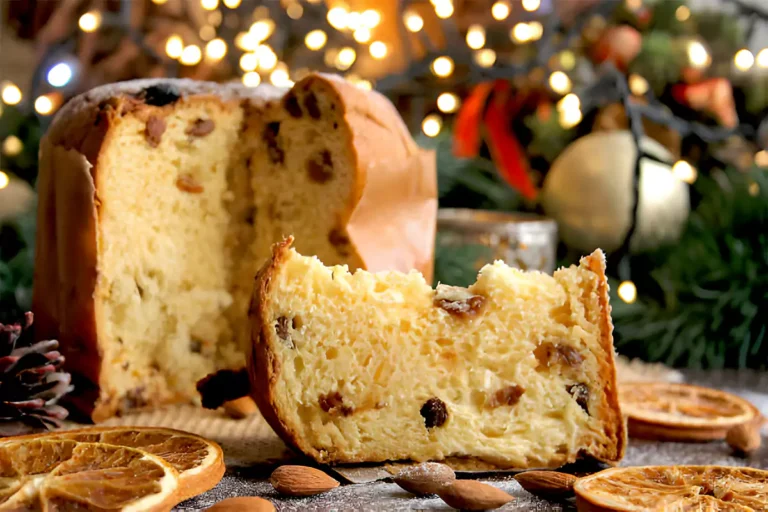
But what makes panettone so special, you ask? Well, it’s not just a bread; it’s a masterpiece of flavors, textures, and aromas. Imagine a buttery texture, speckled with succulent dried fruits and a hint of citrus, all coming together in a towering, dome-shaped delight. It’s a labor of love, a testament to the baker’s patience and skill, making each slice a bite of history and tradition.
The story of panettone is as rich as its flavor. The origins of panettone are steeped in history, with tales that trace back to the Renaissance, making it a luxurious treat reserved for grand celebrations. Learn more about the fascinating history of panettone. Today, while you can find panettone in many stores, nothing compares to the magic of a homemade loaf. It’s an invitation to slow down and savor the panettone recipe process, infusing your holiday with the charm of Italian baking.
So, whether you’re a seasoned baker or a curious novice, ready to dip your toes into the world of yeast breads, this journey through the art of making panettone promises to be as rewarding as it is delicious. Let’s roll up our sleeves, sprinkle a dash of holiday spirit into our flour, and begin this enchanting baking adventure.
Ingredients and Equipment
Essential Ingredients for Crafting the Perfect Panettone
When it comes to baking, especially something as traditional and nuanced as panettone, the devil, as they say, is in the details. The choice of ingredients isn’t just important; it’s paramount. After all, each component plays a pivotal role in the symphony of flavors and textures that define this festive dessert.
First up, flour – the backbone of our panettone recipe. Opting for high-quality all-purpose flour gives the bread its structure, ensuring that soft, buttery texture we’re all after. Eggs enrich the dough, contributing to a rich, tender crumb in the panettone, much like the secrets to a moist cake revealed in our Ultimate Guide to Moist Bundt Cakes. For more on essential baking ingredients and their roles, check out these key baking tips and techniques.
Sugar is more than just a sweetener here; it’s a crucial player in the fermentation process, feeding the yeast and contributing to the bread’s golden hue. And let’s not forget the unsung heroes: the dried fruits and nuts. Whether it’s raisins soaked in rum or candied orange peel, these add-ins are not just ingredients; they’re little jewels that dot our bread with bursts of flavor and texture.
But perhaps the most magical of all is the yeast. This humble fungus is what breathes life into our dough, causing it to rise and transform into a light, airy masterpiece. It’s a reminder that sometimes, the smallest things can make the biggest difference.
Must-Have Tools for Your Panettone Baking Adventure
Now, onto the tools of the trade. While panettone doesn’t require an arsenal of gadgets, the right equipment can turn a good baking experience into a great one.
The panettone mold is crucial, much like the right tools are essential in our Bundt Cake Essentials Guide, ensuring your baking success. Traditionally tall and cylindrical, these molds are designed to support the dough as it climbs upwards, striving to reach its full, glorious height. While metal molds are an option, many bakers prefer the convenience of paper molds, which not only eliminate the need for greasing but also add a touch of authenticity to the presentation.
Don’t have a panettone mold? Fear not! A bit of ingenuity can go a long way. A high-sided cake pan or even a coffee can, lined with parchment, can serve as a makeshift mold. Remember, it’s not about having the perfect tools but about making the tools you have work perfectly for you.
In the end, baking panettone is as much about the journey as it is about the destination. It’s a dance of ingredients and equipment, a blend of tradition and personal touch. So, gather your flour, your fruits, your mold, and let’s take the next step in bringing our panettone to life. After all, every sprinkle of flour, every stir of the spoon, is a step closer to a holiday filled with warmth, joy, and the irresistible aroma of freshly baked bread.
The Panettone Recipe
Laying the Foundation: The Sponge for Your Panettone
Before we dive into the heart of our panettone recipe, let’s start with the foundation: the sponge. This initial step is crucial, as it sets the stage for the yeast to work its magic, ensuring our bread rises to the occasion, both literally and figuratively.
To begin, you’ll need a cozy corner of your kitchen and a bowl of warmth for your yeast. Mix a portion of the flour with water and yeast, whisking them together until they form a thick, smooth batter. This mixture, or “sponge,” will need about 45 minutes of peace and quiet, covered with a cloth, as it doubles in size. It’s a gentle reminder that good things, indeed, come to those who wait.
During this time, the yeast awakens, feasting on the flour and water, bubbling and growing. It’s a beautiful display of nature’s simplicity and complexity, all happening within the confines of your mixing bowl.
Blending Ingredients: The Heart of the Panettone Recipe
With our sponge ready, it’s time to bring the rest of our ingredients into the fold for the panettone recipe. Additionally, this is where the panettone starts to take shape; moreover, where the buttery texture and rich flavors begin to develop.
As you gradually incorporate the remaining flour and eggs into the sponge, one at a time, you’re laying the foundation for a masterpiece. Discover more about the science behind baking and why recipes work the way they do. This step is a delicate balance, a dance between adding enough structure to support the fruits and nuts while keeping the dough soft and tender.
As you mix, the dough will transform, becoming smooth and elastic. It’s a tactile pleasure, feeling the dough beneath your fingers, witnessing the transformation from simple ingredients to a living, breathing entity.
Adding the softened butter is the final step in this process, a moment that requires patience and a gentle touch. The butter enriches the dough, giving it that luxurious, tender crumb that panettone is famous for. It’s a reminder that sometimes, the most indulgent things in life are worth the extra effort.
The Crucial First Rise: Elevating Your Panettone Recipe
Now, the panettone recipe dough needs time to rest, rise, and develop its flavors. This first rise is a slow, gentle process, often done overnight in the refrigerator. It’s a testament to the power of time, how it can enrich and deepen flavors, transforming our dough into something truly special.
As the dough rests, the yeast continues its work, the flavors meld and mature, and the anticipation builds. It’s a quiet, almost meditative time, a pause in the hustle and bustle of holiday preparations.
Shaping and Baking
Sculpting the Perfect Panettone: Techniques and Tips
After the panettone recipe dough has doubled in size, it’s time for a little makeover. Additionally, shaping the panettone is not just about aesthetics; it’s about ensuring even baking and the perfect dome-like structure that makes this bread a centerpiece.
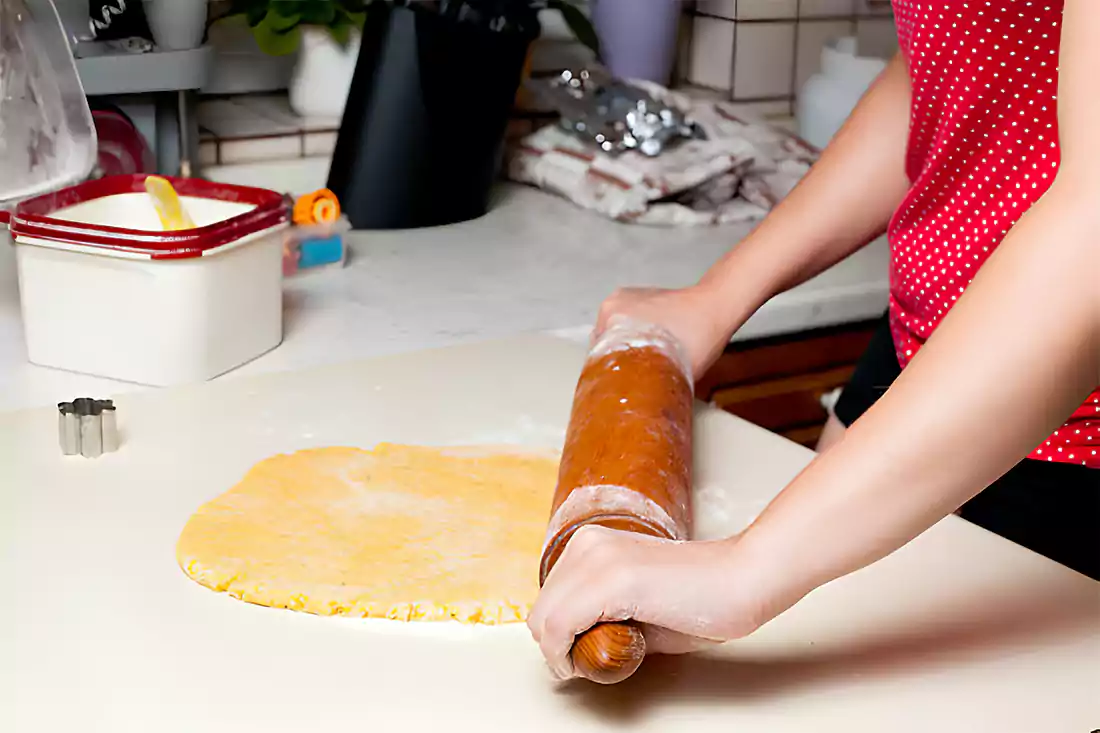
Begin by gently turning the dough out onto a lightly floured surface. You’ll want to handle it with care, as if it were a delicate treasure. Flatten the dough into a rectangle, but don’t worry about getting the edges perfect. This isn’t about precision; it’s about creating a canvas for the dried fruits and nuts, those little jewels that will sparkle in every slice.
Scatter the soaked fruits and nuts evenly over the dough, pressing them in gently. Then, fold the dough over itself, like you’re tucking it into bed, ensuring the fruits are cozily enveloped within. The final step is to form a ball, sealing in the goodies, and then nestle this bundle of joy into the panettone mold. It’s a moment of transformation, where our dough begins to take on the iconic shape of the panettone.
Cover the dough with a clean cloth and let it rise again. This is where the magic happens, where the dough stretches upwards, reaching for the stars, or at least the top of the mold. It’s a slow, gentle rise, filled with anticipation and the promise of something wonderful.
The Final Step: Baking Your Panettone to Golden Perfection
With the panettone recipe dough shaped and risen, it’s time for the grand finale: baking. Preheat your oven, and while it warms, take a moment to admire your handiwork. This is the culmination of patience, skill, and a little bit of baking magic.
A gentle cross cut on top of the dough before baking not only adds to the aesthetic but also aids in the baking process. For more on this and other techniques, explore these detailed baking tips. This isn’t just for decoration; it’s a nod to tradition, a way to let the bread expand gracefully as it bakes.
As the panettone bakes, the kitchen fills with an aroma that’s nothing short of heavenly. It’s a blend of butter, fruit, and the unmistakable scent of baking bread, a perfume that speaks of home, holidays, and happiness.
Baking the panettone is a test of patience. It requires a watchful eye and a gentle touch, especially when it comes to covering the top with foil to prevent it from browning too quickly. But the reward is worth every minute, every check through the oven window.
Baking panettone to perfection is a triumphant moment. After it turns golden and a skewer comes out clean, let it cool, relishing the anticipation of that first slice – a delightful blend of textures and flavors, a testament to the art of baking.
Shaping and baking panettone goes beyond a recipe’s final steps; it embodies the essence of holiday baking. It honors tradition, conveys love, and bestows flavors and joy. As you remove your panettone from the oven, remember that you’ve crafted more than just bread; you’ve created a masterpiece, a slice of holiday magic that warms hearts and elicits smiles.
Ingredients:

Regarding the Sponge:
- 1/2 cup (120ml) warm water
- 2 teaspoons (7g) active dry yeast
- 1/2 cup (65g) all-purpose flour
Concerning the Dough:
- 3 1/2 cups (455g) all-purpose flour, plus extra for dusting
- 1/2 cup (100g) granulated sugar
- 3 large eggs, at room temperature
- 1 egg yolk, at room temperature (reserve the white for the glaze)
- 3/4 cup (170g) unsalted butter, softened
- Zest of 1 lemon
- Zest of 1 orange
- 1 teaspoon (5ml) vanilla extract
- 1/2 teaspoon (3g) salt
In relation to the Fruit:
- 3/4 cup (120g) raisins
- 1/2 cup (80g) candied orange peel, chopped
- 1/4 cup (60ml) rum or orange juice
For the Glaze (optional):
- Reserved egg white
- 2 tablespoons (25g) granulated sugar
- Handful of sliced almonds
Directions:
1. Prepare the Sponge:
- In a small bowl, dissolve the yeast in warm water and let it sit until frothy, about 5-10 minutes.
- Stir in 1/2 cup of flour until a smooth paste forms. Cover with plastic wrap and let it rise in a warm place until doubled in size, about 30-45 minutes.
2. Soak the Fruit:
- Combine the raisins, candied orange peel, and rum or orange juice in a small bowl. Let the mixture soak while the sponge is rising, then drain and set aside.
3. Make the Dough:
- In a large mixing bowl or the bowl of a stand mixer, combine the risen sponge with the eggs, egg yolk, sugar, lemon zest, orange zest, vanilla extract, and half of the flour. Mix until smooth.
- Gradually add the remaining flour and salt, mixing until a soft dough forms.
- Add the softened butter, a tablespoon at a time, kneading well after each addition until the butter is fully incorporated and the dough is smooth and elastic.
- Gently fold in the drained fruit mixture until evenly distributed.
4. First Rise:
- Place the dough in a lightly greased bowl, cover with plastic wrap, and let it rise in a warm place until doubled in size, about 1-2 hours.
5. Shape the Panettone:
- Punch down the risen dough and shape it into a ball. Place the dough ball into a panettone mold or a prepared pan with high sides.
- Cover and let it rise again until it domes above the rim of the mold, about 1 hour.
6. Prepare the Glaze (optional):
- Whisk the reserved egg white with sugar until frothy. Brush the top of the risen dough with this mixture and sprinkle with sliced almonds.
7. Bake:
- Preheat the oven to 350°F (175°C).
- Bake the panettone in the preheated oven for about 40-50 minutes, or until golden brown and a skewer inserted into the center comes out clean.
- If the top browns too quickly, cover it loosely with aluminum foil.
8. Cooling:
- Remove the panettone from the oven and let it cool in the mold on a wire rack.
Enjoy your homemade panettone as a festive treat; however, it is perfect for breakfast, dessert, or as a holiday gift. Moreover, remember, the beauty of panettone lies in the love and care you put into baking it, making it a truly special addition to your holiday traditions.
Serving and Storage
Presenting Your Panettone: Serving Ideas and Inspiration
The moment has arrived. Your panettone recipe creation is baked to perfection, its golden crust a testament to your patience and skill. But before you dive into this festive dessert, let’s talk about serving it in a way that honors its rich tradition and buttery texture.
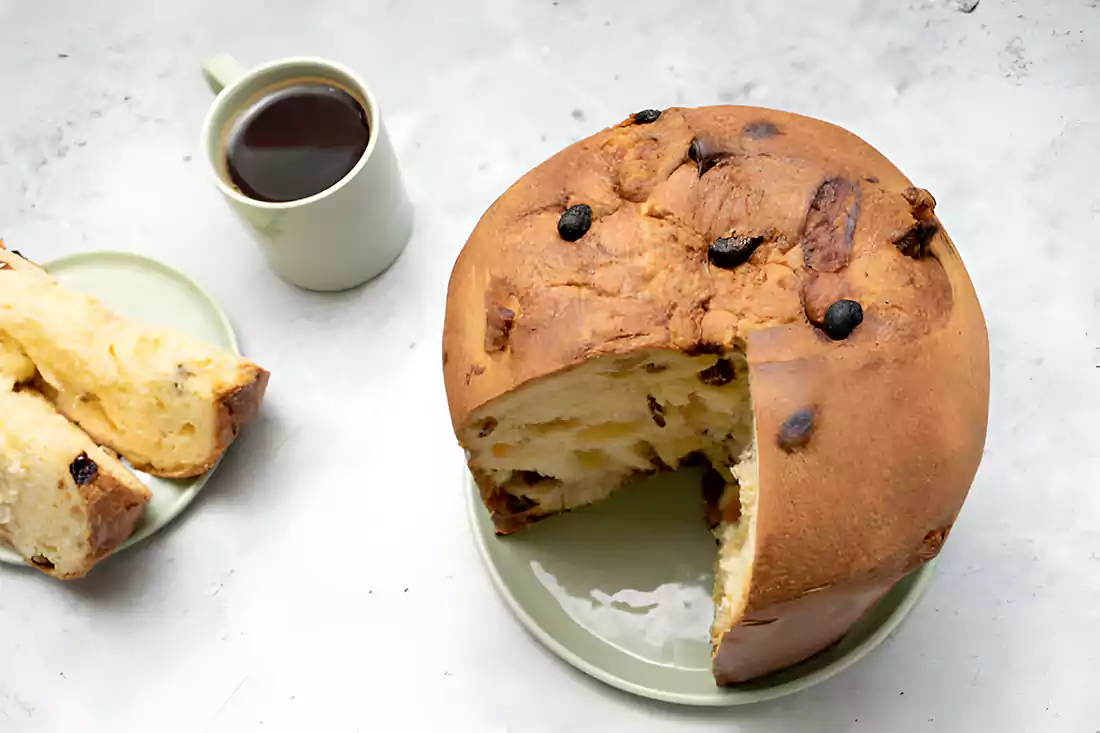
Slicing into the panettone is an experience in itself. Whether you prefer thick wedges or delicate slices, each cut reveals the mosaic of fruits and nuts within, a colorful testament to the holiday season. Serve it on a platter that complements its stature, perhaps alongside a pot of freshly brewed coffee or a glass of sweet dessert wine, creating a moment that’s as much about the company as it is about the food.
The versatility of panettone extends beyond dessert, making it a perfect companion for various holiday moments. For creative ways to serve and enjoy it, consider exploring innovative baking and serving ideas. Toasted slices for breakfast, perhaps with a smear of butter or a dollop of mascarpone, transform the bread into a morning delight. Or, for a post-dinner treat, a light grilling brings out the sweetness of the fruit, paired beautifully with a scoop of vanilla ice cream.
Keeping Your Panettone Fresh: Storage Tips and Tricks
After the last crumb has been savored and the final toast made, you might find yourself with leftovers. Fear not, for panettone is as gracious in storage as it is in serving. Wrapped tightly in plastic wrap or foil, your bread will keep its buttery texture and delicate flavors for up to five days, though it’s rare for it to last that long on the countertop.
Should you find yourself with more panettone than you can enjoy in a few days, the freezer is your friend. Wrapped securely to protect against freezer burn, panettone can be frozen for up to two months. When the craving strikes, simply thaw it at room temperature, and it’s as if you’ve just pulled it from the oven.
But what to do with those last few slices, a bit too dry for eating out of hand? Additionally, panettone’s versatility shines here as well. Furthermore, transformed into French toast or a luxurious bread pudding, these leftovers become a new delight, ensuring that not a single crumb of your labor of love goes to waste.
In serving and storing your panettone, you extend the holiday cheer, making each slice a reminder of the warmth and joy of the season. Additionally, it’s a bread that keeps on giving, from the first slice to the last crumb, a celebration of tradition, flavor, and the simple pleasures of holiday baking.
Panettone Recipe FAQs: Expert Answers to Your Baking Questions
Baking with the panettone recipe, with its rich tradition and intricate steps, often brings up questions. Whether you’re a first-timer or looking to perfect your technique, these FAQs are here to guide you through the process, ensuring your panettone is nothing short of spectacular.
Can Panettone Be Made Without a Stand Mixer?
How to Deal with Dough That’s Slow to Rise?
Dough that takes its sweet time to rise is a common hurdle in cooler climates. But don’t let a sluggish rise dampen your spirits. Creating a warm, draft-free environment can encourage your dough to puff up more promptly. Some bakers swear by turning their oven into a makeshift proofing box: just turn it on to the lowest setting for a few minutes, then turn it off and place your dough inside with the door closed. The residual warmth creates a cozy haven for your dough to rise. Just be sure to keep an eye on it, as you don’t want it to get too warm.
Creative Uses for Leftover Panettone
Transform leftover panettone into delightful treats, and for more baking tips, discover how to Prevent Soggy Rice Krispie Treats,.from French toast to luxurious bread pudding. For inspiration, dive into these essential baking tips and techniques. Explore creative ways to enjoy French toast! Try it in a trifle with custard, fresh fruit, and whipped cream for a luscious dessert. Cube it and add to a salad with arugula, gorgonzola, and balsamic glaze for a unique twist. For a quick treat, toast it with butter under the broiler, making it a delightful pairing with your coffee or tea.
In navigating these FAQs, remember that baking panettone is as much about the journey as it is about the destination. Each challenge is an opportunity to learn and grow, making your next panettone even more delightful than the last. So, embrace the questions, dive into the process, and let the sweet, buttery texture and rich flavors of this traditional holiday bread fill your home with warmth and joy.
Reflecting on Your Panettone Baking Odyssey: A Sweet Conclusion
Firstly, as we conclude our journey with the panettone recipe, let’s reflect on the process, from yeast activation to the golden-brown masterpiece from the oven. Additionally, each step celebrates the joy of baking and its role in our holiday traditions.
Just like the Gingerbread Bundt Cake, panettone is a symbol of celebration, rich in history and luxurious flavors, making it more than just a bread, a centerpiece for gatherings, and a gift of love to those we cherish. The process of baking this Italian Christmas bread, while intricate, teaches us patience, precision, and the importance of quality ingredients. It reminds us that some of the best things in life require time, effort, and a touch of creativity.